Replace AdBlock+ with µBlock
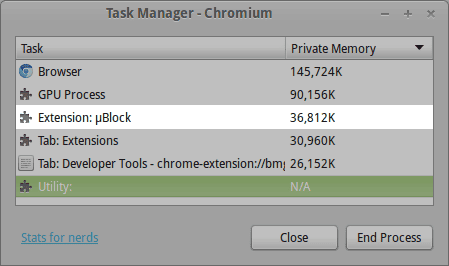
Those of you who are at least somewhat tech savvy or have friends who know how to handle computers, you most likely have an ad blocker plugin installed. Maybe even two… you know… just in case. However, what you probably don’t know is that every single plugin takes away a big chunk of your computer’s memory! AdBlock+ helped me many years, removing those YouTube Ads and keeping my screen distraction-free. But the plugin consumes too much performance, which I actually need for other awesome plugins. Lucky for all of us, a developer came up with a brand new ad blocker plugin that cuts your ad blocker’s performance needs by a factor of 3!!! That’s right. Same effect, and just a third of the performance needed. Go ahead and disable AdBlock and install µBlock from the Chrome store. Works like a charm.
Prank your friends with Inspect Element
As you know, websites are made out of code, which is rendered by browsers to make it visually appealing. And you can use that to your advantage and prank your friends, colleagues and family members! With the Inspect Element function you can change text on the website, enter something of your own, and it will look just like it has always been there! For example, you can prank your colleagues at work by making them believe someone hacked their LinkedIn account and changed their headline, or simply changing the text and the amount of likes of their latest Facebook status update. To do so, select some kind of text on any website, right-click it and select the Inspect Element option from the menu. You should now see the HTML code of the website. Now in that code you will need to find the text you have just selected, and once you found it double-click, change it to anything you want and press Enter! FYI, you are not actually changing the website, just the current rendering in your browser. This means, that once you reload or close the page all your changes will be discarded. Just as an exercise, try changing the word below to anything you want: TRY IT
Pin Tabs
When I’m at the office I usually have a set of tabs open, which I need to access on demand, but not necessarily have to look at often (they HAVE to be open at all times). To de-clutter the mess you made of your tabs bar, simply right-click an open tab in Chrome and press “Pin Bar”. What this will do is pinning the tab to the far left of your browser, removing the title of the website to make the tab appear smaller, and simply gets these important tabs out of the way, but still accessible for you when you need them.
Get more icons in your bookmarks bar
Usually, when you create a bookmark in your bookmarks bar you will see a small icon (aka favicon) and the title of the page. In most cases, the icon is more than enough to you to tell what website it will lead to. So, to get much more out of your bookmarks bar in Chrome, simply remove the titles from your bookmarks. Now you have so much space at your disposal! I currently have more than 20 bookmarks in my bookmark bar. If I wouldn’t have removed the title it would only fit 8-10 of them (If you’re lucky). Removing titles from bookmarks is very easy. Simply right-click the bookmark you want to edit, press “Edit…”, remove everything from the field that says “Name” and press Save. Now that you have so much more space, you can also go ahead and organize your bookmarks into folders and subfolders. Having a good bookmark structure goes a long way if you’re at least a bit like me and have 100+ bookmarks, with new ones being added almost on a daily basis.
Close multiple tabs at once
You have probably found yourself in a situation once, where you had so many Chrome tabs open that you couldn’t even tell them apart. I’ve been there, and it’s alright. In these cases, I try to keep my important tabs on the left (maybe even pin them) and the rest goes to the right. Now Chrome has a nice feature, which allows you to close all tabs to the right of a certain tab. To do so, right-click on the farmost right tab that you DON’T want to close, and click on “Close all tabs to the right”. Very simple, but also very useful.
Restore Chrome tabs that you have accidentally closed
Sometimes it happens that you accidentally close an important tab. No need to worry my friend! There is actually a very easy way to restore your closed tabs in Chrome. Simply right-click on an open tab and select the “Reopen Closed Tab” option on the bottom of the drop-down menu. You can repeat this process for multiple tabs as well, in case you have accidentally closed many tabs at once. And this actually brings us to the next point…
Prevent losing text that you have previously typed somewhere
So you have typed a long message to a friend or were filling out an online form with a seemingly endless amount of text fields… The worst thing that could happen to you at the moment is if the window with the text somehow disappeared! Whether your computer or browser has crashed or you have accidentally closed a tab (which you know is not an issue anymore), you need to get your text back. Lucky for us there is a Chrome extension called Lazarus: Form Recovery, which does exactly what it’s called – it restores forms. Simply install the extension from the Chrome store and there will be no need for you to worry about losing the stuff you have entered in a form. Try it yourself! Once you have installed the plugin, go ahead and type something in the subscription form in the sidebar on your right, close the tab and re-open it using the technique I have showed you before. You will see that the content of the form is exactly what you have entered before.
Switch between Google accounts in Chrome
If you work in an office, chances are that you have multiple Google accounts, since quite a lot of companies are using Google Apps for Business nowadays. I, for example, have 3 Google Accounts, which I use on a regular basis (and at the same time). With Chrome’s built-in feature, there is no need for you to log in and out of your Google accounts to work from another one. To add a new Google account to your Chrome browser for easy switching, go ahead and open your settings and press the “Add People” button below the “People” field. Now enter your details and log into your other Google account. If you have the latest version of Chrome installed on your computer, you will now see a new icon in the top right corner of your browser. If you click on this little button (mine just says “Daniel”) you will have the option to Switch Person, which means opening a new Chrome window for your second Google account. Now you can use multiple Google accounts at once without switching between them all the time.
Disable autoplay in Chrome
Don’t you hate it if you open another news site just to see a completely irrelevant video playing in the sidebar? (Looking at you all the news websites out there) Well, there is a very easy in-built solution to that problem. With just a few clicks here and there you will disable any kind of auto-play in Google Chrome, and from now on you will only see something playing if you intend to. To disable autoplay, go your Settings > Advanced > Privacy & Content Settings and find the Plug-Ins section. For the lazy: copy and paste this into your URL bar: chrome://settings/content#click_to_play Now all you need is switch from “Run automatically” to “Click to play”.
Add home button to Chrome
Feeling old school? Some just prefer having an easy access to your favorite homepage. Per default, Chrome doesn’t come with a Home button, but it’s very easy to get it back
Mute tabs with playing audio
If you haven’t noticed it yet, every time there is any kind of audio playing within a page, a speaker icon will appear in the current tab to indicate that this tab has audio playing. Quite a nice feature, but Chrome took it to the next level. Now you can mute the audio without actually opening the tab if you are currently browsing another one by clicking on the speaker icon! To enable this experimental feature copy and paste this link into your URL bar in Chrome (chrome://flags/#enable-tab-audio-muting) and enable “Enable tab audio muting UI control”. This feature should work on all major operating systems.
Conclusion
There is SO MUCH MORE to Chrome than most users know. However, some of these features and extension can (and will) significantly improve your Chrome experience. If you found these tips interesting, please share them with their friends and help them getting the most out of our favorite browser! I will update this post with more tips and tricks over time, so please leave a comment below if you can think of an awesome Chrome tip and I will put it in the post!