It’s not just for MacOS either. It also includes iOS, iTunes, and Apple TV (tvOS). It is very easy to get into the beta program, as it is obviously in Apple’s best interests to have as many testers as possible. However before you rush into it, there are some things you need to know about it.
What You Need To Know About The Apple Beta Software Program
There’s no going back. Once you have installed a beta version of a program, you can’t roll it back to the previous version. Even if you decide to leave the beta program, you will be stuck with the current beta version until Apple releases the stable public version. Beta versions, by their very name, are test versions. Therefore they are not perfectly polished products. Crashes and data loss are both quite possible. Therefore Apple strongly urges continual backups of your data to iCloud and Time Machine. Since beta versions are buggy and unreliable, Apple strongly recommends that you install the beta software on a non-essential computer (i.e. not your work computer). Or make a new partition and dual-boot. Updates to each beta program will be constant as new tweaks and improvements are rolled out by Apple. So be prepared for lots of system updates and computer restarts. Although it is not obligatory at all, Apple obviously needs feedback. That is the whole point of being a beta tester in the first place. If you are not prepared to give feedback, you should reconsider whether or not you want to do this. Joining the beta program and not participating in feedback is like being a football player and lying down on the grass for the entire 90 minutes.
Since I don’t have an Apple TV, I will only be covering the MacOS and iOS versions of the beta software programs here.
Joining The MacOS Apple Beta Software Program
On the MacOS computer you want to register for the program, go to the official beta page.
Now click the blue “sign up” button and log in with your iTunes account details for that computer.
You will then be asked to agree to the usual User Agreement, which you have to lie and say you’ve read and understood. You also have to commit to cutting off your arm and selling your grandmother to Tim Cook.
Now click on the blue MacOS tab, or alternatively go to this link. It’s all one and the same. Then click on “Enroll Your Mac” under the “Get Started” heading.
Installing The Utility Program
Now click on the blue “Download MacOS Sierra Public Beta Access Utility” button. Download and install the DMG program that follows. It is a very small program and only takes seconds to install. Obviously you need to be running Sierra first.
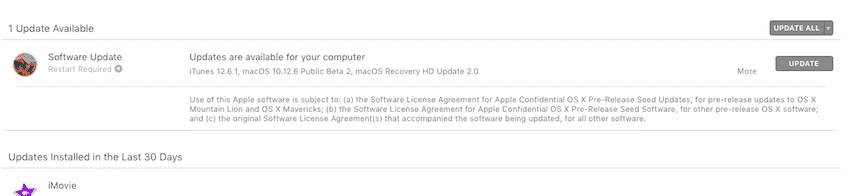
What this program does is push all of the available beta programs to your computer via the Mac App Store. So as soon as the utility tool is installed, the App Store will immediately open to its “Updates” page. It will then start searching for beta programs. This can take a few minutes so be patient. Eventually you will be given what is available.
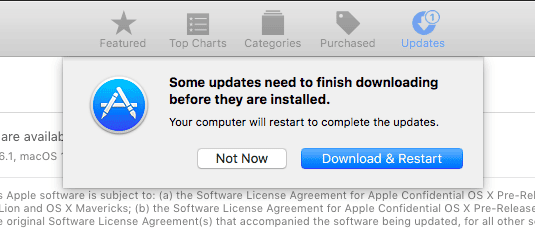
In this instance, you have available a new version of iTunes, a new MacOS operating system, and a new version of MacOS Recovery (the program for reinstalling your Mac system). Click “Update All” to install. Note it tells you a restart is required, so make sure all of your work is saved and closed first, and all other programs closed down to make this go faster.
The software update here was 1.80GB in size, so something to bear in mind if you are running low on gigabytes.
Restart The Computer
When the computer restarts, the update will start installing. You will see a silly amount of time on the screen (33 minutes!), but in reality, it took just over 10 minutes.
When you get back into your computer, you will see something new in your dock.
The violet circle with the exclamation mark is Apple’s Feedback Assistant. This is where you can send Apple any feedback on the beta programs.
For example, if anything crashes, if a feature doesn’t work as it should, anything Apple should know about, the Feedback Assistant is where you would send it. Obviously you are not going to get a response from Apple, due to the overwhelming amount of feedback they will be getting through the program.
Leaving The MacOS Apple Beta Software Program
If you start to get tired of constant updates and continual crashes, you can opt out of the program. Doing so is extremely easy. First go to the Apple menu and choose “System Preferences”.
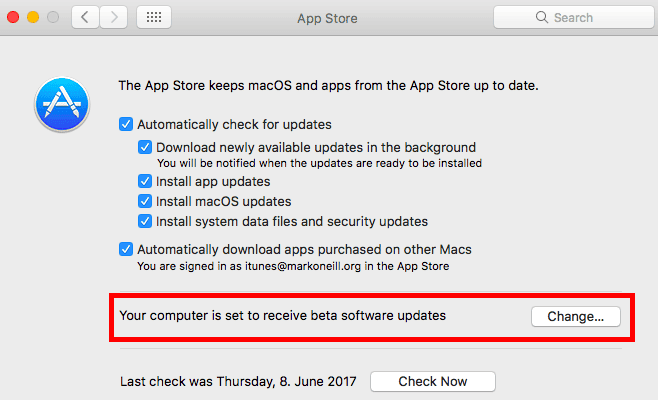
Choose the App Store preferences. When it opens, you will see a new part which has been added, back when you joined the program.
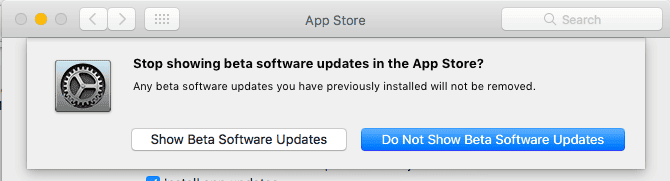
The “change” button will be greyed out. You can change that by clicking the padlock icon at the bottom of the screen and entering the administrator password. After that, click the “change” button. You will now see this.
Click “Do Not Show Beta Software Updates” and you are out. However, as the box says, any beta software updates you have installed will not be removed.
Joining The iOS Apple Beta Software Program
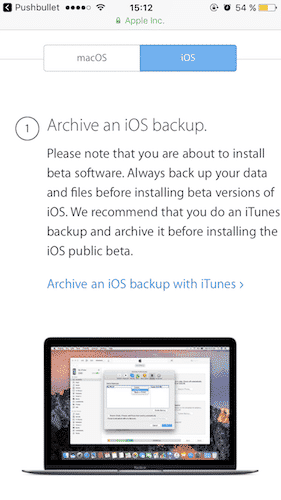
By registering your Mac for the program, you are also registering for the iOS program (and vice-versa). First, you need to log into the beta page with your iTunes account. This must be done with the Safari browser on your iOS device. It will NOT work on any other browser, such as Chrome or Firefox. Then tap on the blue iOS tab at the top of the page. It will recommend that you backup the contents of your iPhone to iTunes. Do NOT skip this step.
Secondly, download the profile that the beta page specifies. You can do this by tapping the blue “Download Profile” button. This is the iOS equivalent to the Utility Tool for MacOS updates.
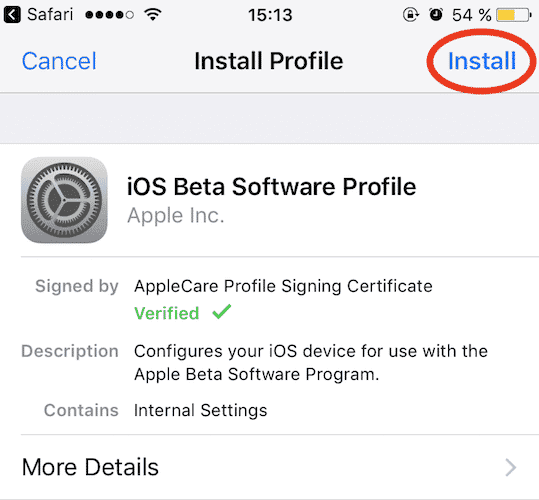
The phone now switches to the settings. Tap the “Install” button in the top right hand corner.
Pretend to read the terms and conditions, and tap “Install” again.
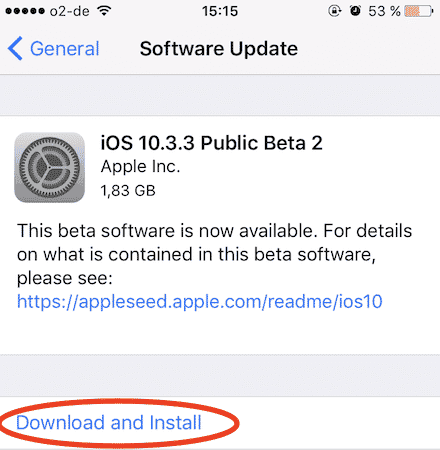
Now any available beta programs will appear on the screen. Tap “Download and Install” to install the beta updates.
Once the beta updates have been downloaded and installed, you will have to restart the iPhone to finish off the process.
You will now notice the Feedback Assistant logo on the iOS device screen. You can open it up to send your feedback to Apple.
Leaving The iOS Apple Beta Software Program
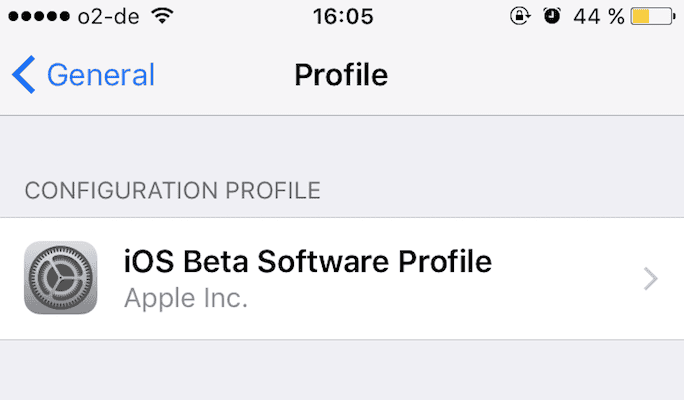
If you decide to leave the iOS beta program, go to your Settings, then General–>Profiles and tap the iOS Beta Software Profile.
At the bottom of the next screen, you will see a “Delete Profile” link. Tap on it, confirm your decision, and you are out.
Contrary to the beta program on MacOS, you CAN roll back the version of iOS back to the last stable version. However, this is dependent on whether or not you backed up your iOS device to iCloud before installing the beta version. If you have an iCloud backup of the last stable version, then you can use iTunes to restore that version.
Leaving The Apple Beta Software Program Completely
Once you have unregistered your devices, you finally need to go to the Apple Beta Software page, and formally leave the program. At the bottom of the page, you will see a section called “How Do I Leave The Program?”.
Click the “Leave Apple Beta Software Program” link to leave the program completely. Of course, if you have a change of heart anytime in the future, you can re-register and participate again. Does a Apple beta tester get a discount on a Apple products? This program is voluntary, and there is no compensation for your participation. So, no, you won’t get any discount on Apple products. Will installing public beta software from the Apple Beta Software Program void my hardware warranty? No, installing the public beta software does not void your hardware warranty. What happens if I remove iOS beta profile from my Apple account? Once your profile is deleted, your iOS device will not receive iOS public betas. When the next commercial version of iOS is released, you can install it from Software Update.
Conclusion
Beta testers are needed to weed out all of the bugs from systems. They are essential to ensuring that when an upgrade is pushed out, it is as perfect as possible. If you have an Apple device and you don’t mind downloading some more system updates, then you should strongly consider joining the beta program.