There are many reasons why you would want, or would need, to reformat something. I can think of three off the top of my head.
Each Operating System Has Its Own System Format
That means once a USB stick or a SD card is formatted for say Microsoft Windows, you will have some difficulties with it on another operating system. For example, I cannot delete files on a Windows-formatted USB stick if I put it into my Mac. So you may want to format something to another operating system format.
Your Operating System May Have Been Damaged By a Virus
If your computer has been hit by a serious virus, or is just generally under-performing, reformatting may be your only option. Reformatting your hard drive will wipe it completely, and you would then need to reinstall the operating system. You should also do this, if you are selling your computer. If you do not reformat your hard drive, deleted files can be recovered by the new owner, if they have the right software. If those files are extremely sensitive (social security number, bank records, etc), then that is obviously not good for you. Before reformatting your hard drive, make sure all of your files are backed up in a secure separate location. But not the operating system files obviously!
Your Removable Media May Have Potentially Embarrassing Hidden Files
When I recently received a SD card from a friend with some holiday photos on it, I had the “show hidden files” option ticked in Windows Explorer. Not for the purposes of the SD card – I merely forgot to switch it off earlier. So when I put the SD card into the computer, up popped all the hidden files which my friend thought were deleted. The actual files were not readable, but the file titles were. They were of the adult variety, so imagine his horror and embarrassment. When you delete a file, the crap “temp files” are left behind. They take up space, but they can’t be seen unless you have the option on to view them. Reformatting will nuke them all for good.
MacOS Disk Utility
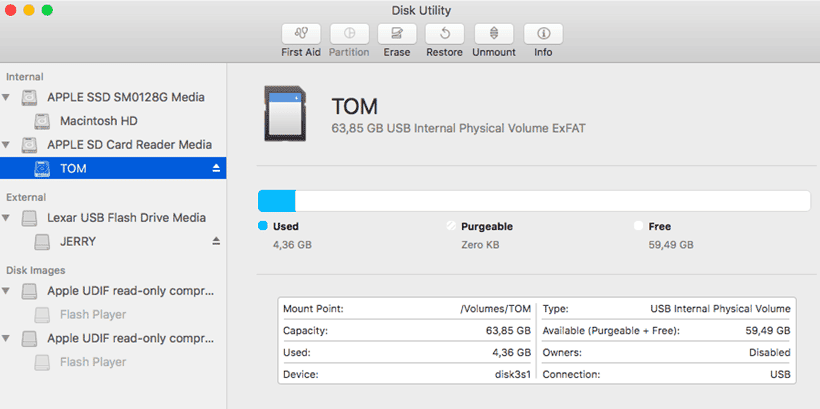
Disk Utility is inside the Utilities sub-folder of the Applications folder. When you start it up, it will look like this.
On the left are all of the hard drives and removable devices that Disk Utility can detect. If you don’t see something here, eject it then re-insert it. It should then pop up in the list. The SD card I will be reformatting today is TOM (the other one is JERRY, get it?). TOM has had some sensitive work files on it, so I want to reformat the card and destroy any chance of the files being recovered by some dastardly dude later. Before I do this though, it is worth quickly going through the other macOS Disk Utility features, in case you are not familiar with them.
Info
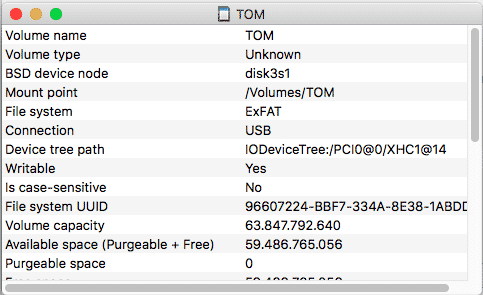
Straightforward to understand. This gives you information about the media you have highlighted.
Unmount
This will safely eject the removable media from the computer, identical to the “eject” function in the Windows right-click menu. Once it has been unmounted, the button will rename itself to “mount”. Press that to start up the removable device again.
Restore
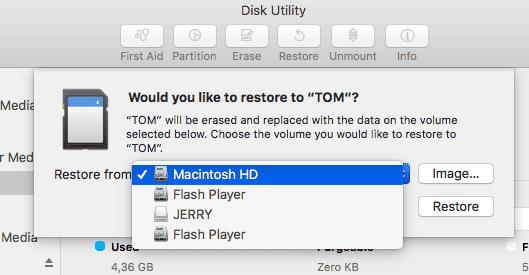
As the screenshot below shows, “Restore” will erase everything on the highlighted device and you can have the contents of another connected device copied over.
Partition
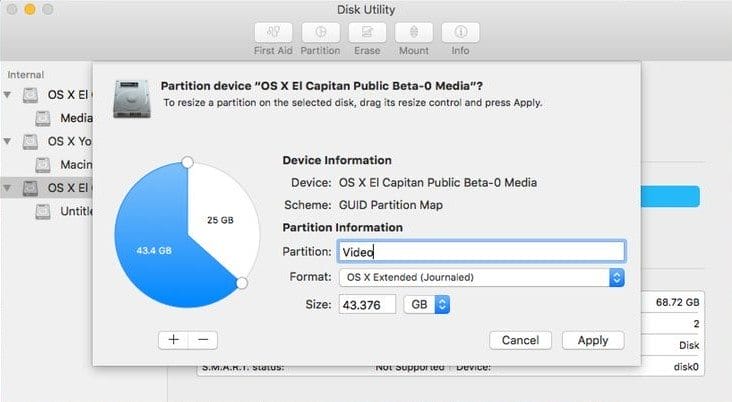
“Partition” allows you to take a hard-drive and split it up into sections. This is invaluable if you are an Apple beta tester, and you want to put the beta OS on a separate area of your computer. Simply choose the hard-drive from the list on the left, and click “partition“. Name your partition, choose the format (make sure it is for MacOS), and the size you want it to be. Disk Utility will do the rest.
First Aid
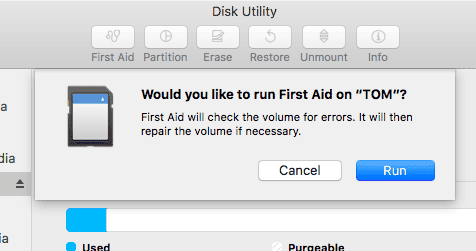
In a nutshell, “First Aid” checks and repairs file system errors on the removable media you have highlighted. If you get strange error messages, or your computer is crashing frequently, then run First Aid to see if it can diagnose the problem.
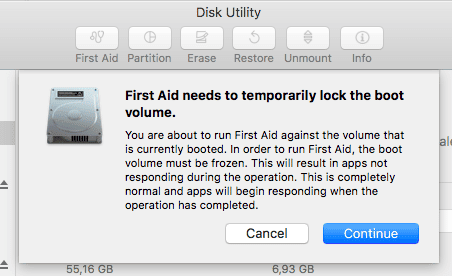
With a hard-drive however, “First Aid” will lock the hard-drive while it is being checked. This means all other programs will be non-responsive. Just a warning in advance!
Erase
Now we finally come to the meat of the article – erasing and reformatting a removable media device. In this case, a SD card.
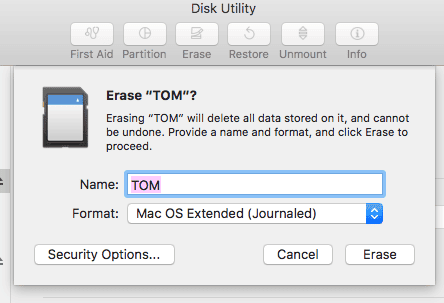
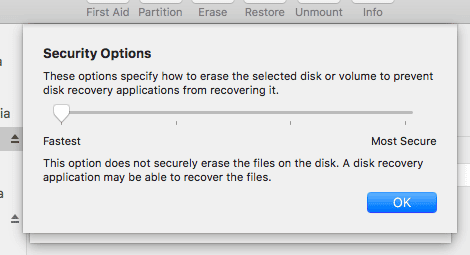
When you click the “Erase” button, you will be given the opportunity to change the name of the card, as well as choose its format. Unless you have a very special reason for doing so, do NOT change the format it is currently on. If you click on the “Security Options” button at the bottom, you will be able to specify how tough the reformatting should be. On the least end of the scale is this :
As it says, it is the fastest method of reformatting but you are not going to securely erase them. The files may still be recoverable. So you need to start moving the slider along until you get to something you are comfortable with. The furthest end of the scale is this and is the hardcore option :
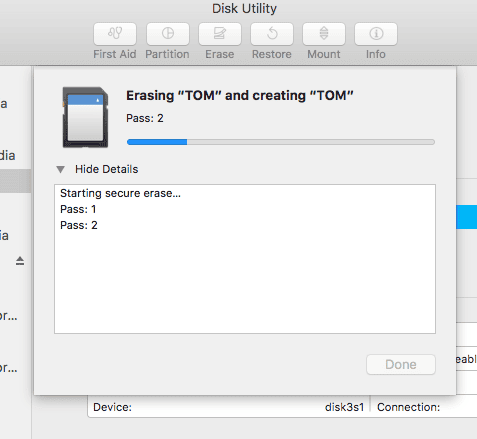
This is bad-ass level. You will be erasing media at the same level as the US Pentagon, by going over the data 7 times. But this comes with a warning. 7 times takes a very….very….long….time. I am now at two and a half hours and counting, and we are only on Pass 2! Extreme security comes at a very high price, including laptop battery!
The crappy thing is that once it starts, it is impossible to stop. You could pull the card out, but you risk damaging it. So be very careful if you decide to go down that route. We don’t recommend it.
Conclusion
As I said before, Microsoft Windows comes with a reformatting option, which lives in the Explorer right-click menu. But I really like MacOS Disk Utility, for the fact that everything is concentrated in the one interface. For me, it’s user-friendly, and hard to mess up. Just my kind of program! Have you had any kinds of negative experiences with MacOS Disk Utility, which you’d like to share? If so, the comments are open and waiting below for your input.


