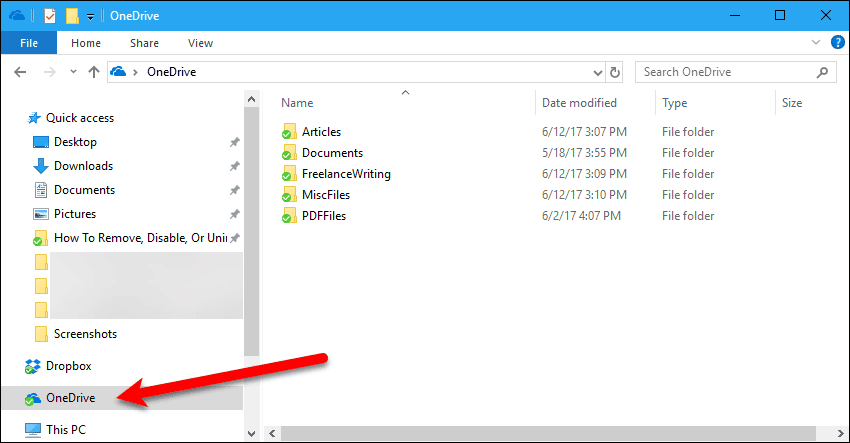
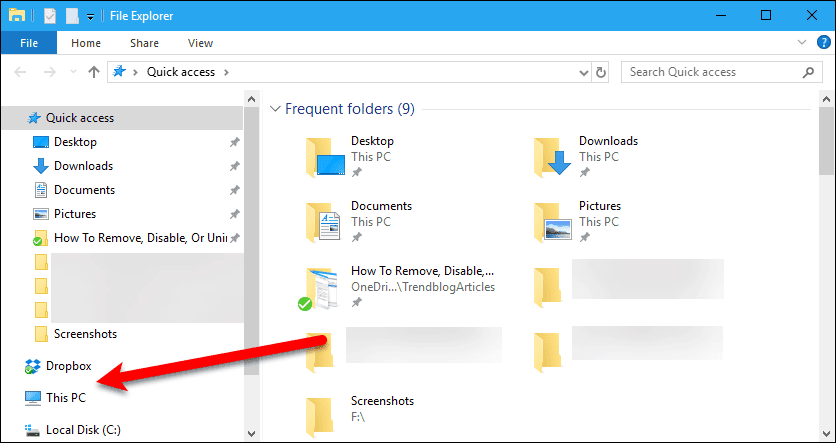
File Explorer lists OneDrive in the navigation pane for easy access. If you don’t use OneDrive often, you may want to hide or remove OneDrive from File Explorer without uninstalling it. There’s no feature or setting to do this, but it’s not hard to do.
IMPORTANT: Editing the registry can be risky if you don’t do it correctly. However, if you follow our directions closely and only change the keys we specify, you should be fine. We do recommend you ALWAYS back up the registry before making changes to it.
Remove OneDrive From File Explorer By Changing The Registry
If you still want to use OneDrive, but don’t want it sitting in the navigation pane in File Explorer, you can remove it by making a change to the registry. If you’re not comfortable editing the registry, we will provide some files in the next section that will make it easy to make the changes for you.
Let’s Go!
To open the Registry Editor, press “Window key+R” to open the “Run” dialog box. Then, type “regedit” (without the quotes) in the “Open” box and click “OK” or press “Enter“.
If the “User Account Control” dialog box displays, click “Yes” to continue. NOTE: You may not see this dialog box, depending on your User Account Control settings. We don’t recommend disabling UAC entirely, however.
In the Registry Editor, we need to access the following key: This is not very easy to find manually. It would be easier to search for it. First, select the “HKEY_CLASSES_ROOT” key in the left pane. Then, press “Ctrl+F” to open the “Find” dialog box. Copy the following, paste it into the “Find what” box, and click “Find Next“.
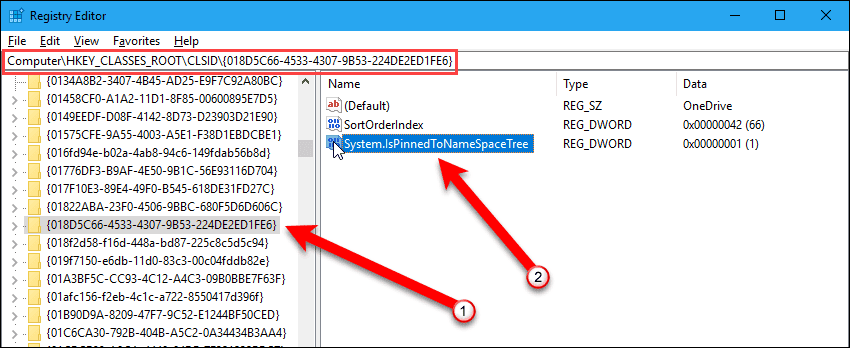
Select the “{018D5C66-4533-4307-9B53-224DE2ED1FE6}” key in the left pane. Then, double-click the “System.IsPinnedToNameSpaceTree” value in the right pane. NOTE: The “{018D5C66-4533-4307-9B53-224DE2ED1FE6}” key can be repeated multiple times in the registry. Make sure that the path to the key in the address bar at the top, or the status bar at the bottom, reads Simply, click “Find Next” on the “Find” dialog box until you see that key path.
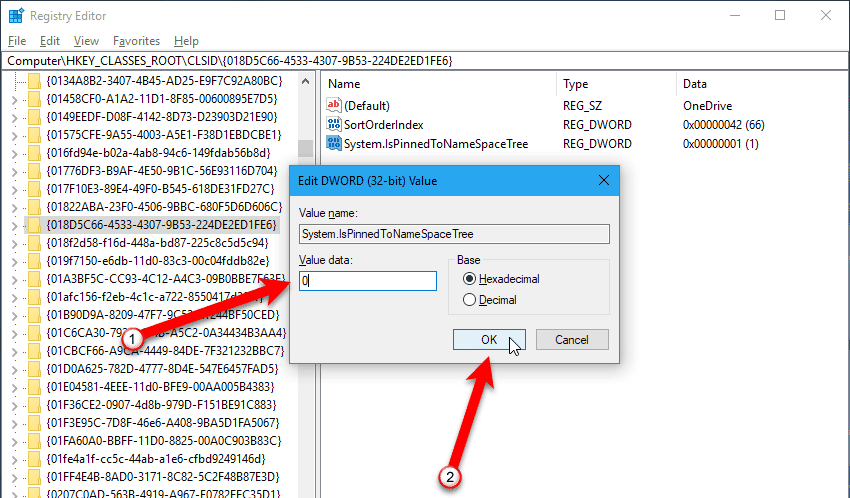
On the “Edit DWORD (32-bit) Value” dialog box, change the “1” to a “0” in the “Value data” box and click “OK“.
If you’re using a 64-bit version of Windows 10, you will need to change another value also. Search for the same key, “018D5C66-4533-4307-9B53-224DE2ED1FE6”, until you find it at the following path: Once you find that key, click on it in the left pane, and then double-click on the “System.IsPinnedToNameSpaceTree” value in the right pane. On the “Edit DWORD (32-bit) Value” dialog box, change the “1” to a “0” in the “Value data” box and click “OK“.
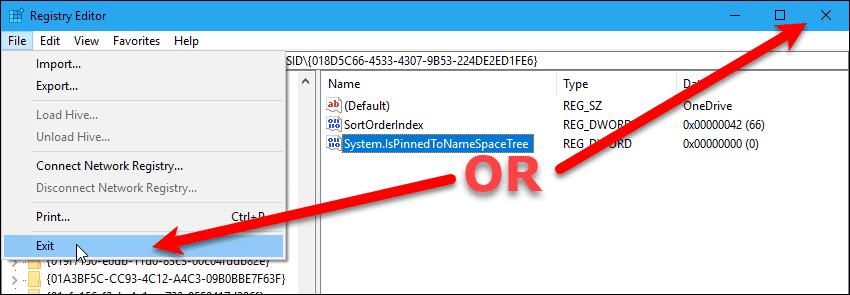
To close the Registry Editor, go to “File” > “Exit” or click the “X” button in the upper-right corner of the dialog box.
Generally, you have to sign out of Windows and sign back in – or reboot – for the change to take effect. However, we found that OneDrive was removed from File Explorer without signing out. It might take a bit of time. If you don’t see it happen, even after closing File Explorer and restarting it, sign out of Windows then back in. Or reboot.
NOTE: This does not uninstall OneDrive. The steps in this section will only remove OneDrive from File Explorer. If you ever want to access OneDrive in File Explorer after removing it from the navigation pane, simply type “OneDrive” (without the quotes) in the address bar and press “Enter“.
To add OneDrive back to the navigation pane in File Explorer, follow the steps in this section, but change the “System.IsPinnedToNameSpaceTree” value back to “1“.
Remove OneDrive From File Explorer Using a Registry (.reg) File
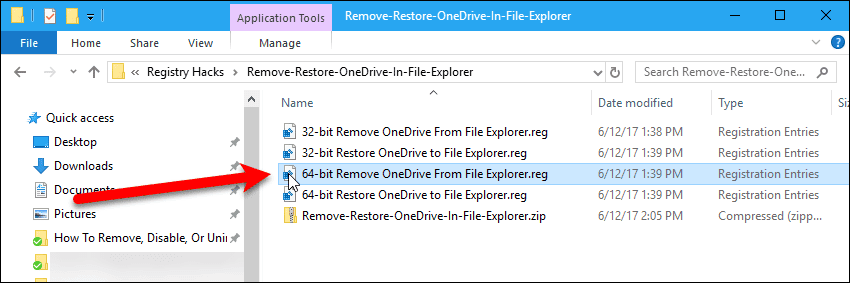
If you’re uncomfortable manually editing the registry, you can download our registry file to automatically make the change. The Hide-OneDrive-From-File-Explorer file contains four .reg files, two files to remove OneDrive (32-bit and 64-bit) and two files to restore OneDrive (32-bit and 64-bit).
Extract & Remove The Registry Files
To remove OneDrive from File Explorer, extract the files from the Zip file and double-click on one of the two “Remove” files, depending on whether your running a 32-bit or a 64-bit version of Windows.
If the “User Account Control” dialog box displays, click “Yes” to continue. NOTE: You may not see this dialog box, depending on your User Account Control settings. We don’t recommend disabling UAC entirely, however.
A warning dialog box displays warning you about making changes to the registry. We tested our .reg files and they work just fine. So click “Yes” to continue.
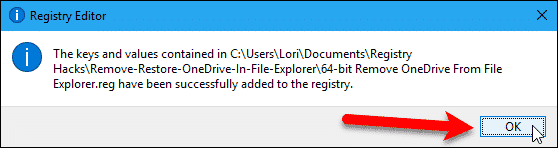
Once the change is made, a confirmation dialog box displays. Click “OK” to close it. Generally, you have to sign out of Windows and sign back in – or reboot – for the change to take effect. However, we found that OneDrive was removed from File Explorer without signing out. It might take a bit of time. If you don’t see it happen, even after closing File Explorer and restarting it, sign out of Windows and back in or reboot. NOTE: This does not uninstall OneDrive. The steps in this section will only remove OneDrive from File Explorer. If you ever want to access OneDrive in File Explorer after removing it from the navigation pane, simply type “OneDrive” (without the quotes) in the address bar and press “Enter”.
To add OneDrive back to the navigation pane in File Explorer, double-click on one of the “Restore” .reg files (32-bit or 64-bit) and click through the same dialog boxes listed above.
Disable & Remove OneDrive Using The Local Group Policy Editor
If you’re using Windows Professional or Enterprise, you can use the Local Group Policy Editor to disable and remove OneDrive. This procedure does not uninstall OneDrive. It stops OneDrive from syncing with the cloud or connecting with other apps, and removes OneDrive from the navigation pane in File Explorer. It also overrides removing OneDrive from the File Explorer by changing the registry. NOTE: When you disable OneDrive using the Local Group Policy Editor, it is disabled for all users on your computer. If other people use your computer, make sure they are not using OneDrive before you disable it.
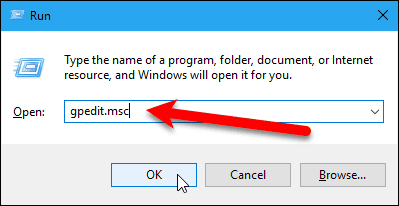
To open the Local Group Policy Editor, press “Window key+R” to open the “Run” dialog box. Then, type “gpedit.msc” (without the quotes) in the “Open” box and click “OK” or press “Enter“.
In the left pane, navigate to the following folder: Click on the “OneDrive” folder. Then, in the right pane, double click on “Prevent the usage of OneDrive for file storage“.
Select the “Enabled” option at the top of the dialog box and click “OK” at the bottom.
To close the Local Group Policy Editor, go to “File” > “Exit” or click the “X” button in the upper-right corner of the dialog box. Sign out of Windows and back in, or reboot, for the change to take effect.
To enable OneDrive again, simply select “Not configured” or “Disabled” on the property dialog box.
Uninstall OneDrive In The Windows 10 Creators Update
As of the Windows 10 Creators Update Version 1703 (or, more specifically, Windows 10 Build 14986), Microsoft OneDrive is finally listed as a standalone app in the “Apps & features” section of the Settings app, allowing you to completely remove OneDrive from Windows easily. NOTE: We don’t recommend completely uninstalling OneDrive, although you can install it again. Uninstalling OneDrive is useful for Windows 10 Home users who cannot use the Local Group Policy Editor method listed in the previous section to disable OneDrive.
Disabling Via The Local Group Policy Editor
If you’re running Windows 10 Professional or Enterprise, we recommend using the Local Group Policy Editor to disable OneDrive. That way you can easily enable it again if you need it. To uninstall OneDrive, open the Start menu and click the “Settings” (gear) icon.
On the “Windows Settings” dialog box, click “Apps“.
On the “Apps” settings screen, make sure “Apps & features” is selected in the left pane. In the search box on the right, type “onedrive” (without the quotes). The results display as you type. Click on “Microsoft OneDrive” in the list of results, and then click “Uninstall“.
Click “Uninstall” on the confirmation pop-up that displays.
If the “User Account Control” dialog box displays, click “Yes” to continue. NOTE: You may not see this dialog box, depending on your User Account Control settings. We don’t recommend disabling UAC entirely, however.
Microsoft OneDrive is removed from the “Apps & features” screen in the Settings. Click the “X” button in the upper-right corner of the dialog box to close it.
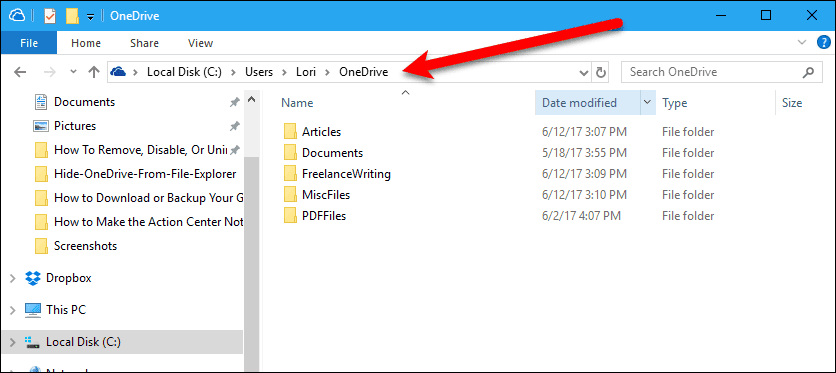
When you uninstall OneDrive, the OneDrive folder in File Explorer’s navigation pane is still there as a normal folder (e.g., “C:\Users\Lori\OneDrive“) with the files that had synced to your computer. The data is not deleted. If you delete the files in the OneDrive folder on your computer, the files will still be in your OneDrive account online. To remove OneDrive from File Explorer, follow the procedures in the “Remove OneDrive From File Explorer By Changing The Registry” section or the “Remove OneDrive From File Explorer Using a Registry (.reg) File” section above.
Once OneDrive is installed and running again, you’ll have to click the OneDrive icon in the notification area and sign in to your Microsoft account.
Uninstall OneDrive In Windows 10 Prior To The Creators Update
If you haven’t updated to the Windows 10 Creators Update, you’ll have to use the Command Prompt to uninstall OneDrive.
Kill The OneDrive Running Process
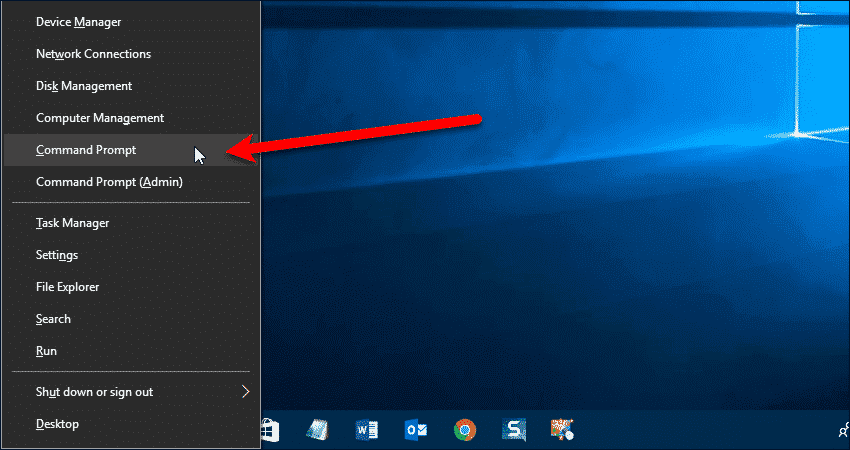
We need to kill the OneDrive running process before we can uninstall OneDrive. To open the Command Prompt window, press the “Windows key+X” to open the Power User menu and then select “Command Prompt“.
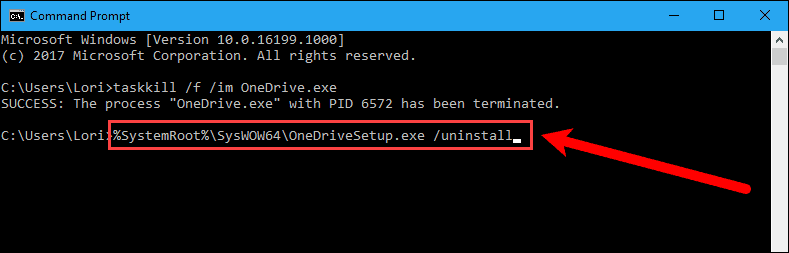
Type the following command at the prompt and press “Enter“. The “/f” parameter forcefully terminates the process and the “/im” parameter specifies the image, or process, name. Follow the “/im” parameter with the name of the process, or image, which is “OneDrive.exe” in this case.
You might not see the OneDrive icon in the notification area go away until you move your mouse over that area. Do not close the “Command Prompt” window yet.
Uninstalling OneDrive
Now that OneDrive is not running, we can uninstall it. Type one of the following commands at the prompt, depending on whether you’re using a 32-bit or 64-bit version of Windows. Then, press “Enter“. Uninstall OneDrive app by running one of the following command: 32-bit Windows 10: 64-bit Windows 10:
If the “User Account Control” dialog box displays, click “Yes” to continue. NOTE: You may not see this dialog box, depending on your User Account Control settings. We don’t recommend disabling UAC entirely, however.
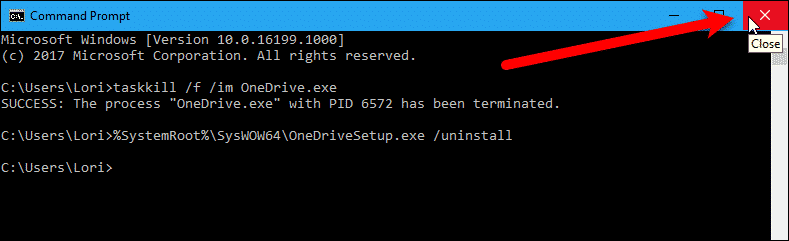
To close the “Command Prompt” window, click the “X” button in the upper-right corner of the window.
Remove The Remnants Of OneDrive After Uninstalling It
After uninstalling OneDrive, some remnants of it will remain. You’ll find files related to OneDrive in the “C:\ProgramData\Microsoft OneDrive” and “C:\Users\Lori\AppData\Local\Microsoft\OneDrive” folders. There’s also a OneDrive folder in the user profile folder, for example, “C:\Users\Lori“. If you want to fully remove OneDrive from Windows, delete these folders manually. You can also remove the registry keys we talked about at the beginning of this article.
Removing The Remnants
To open the Registry Editor, press “Window key+R” to open the “Run” dialog box. Then, type “regedit” (without the quotes) in the “Open” box and click “OK” or press “Enter“.
If the “User Account Control” dialog box displays, click “Yes” to continue. NOTE: You may not see this dialog box, depending on your User Account Control settings. We don’t recommend disabling UAC entirely, however.
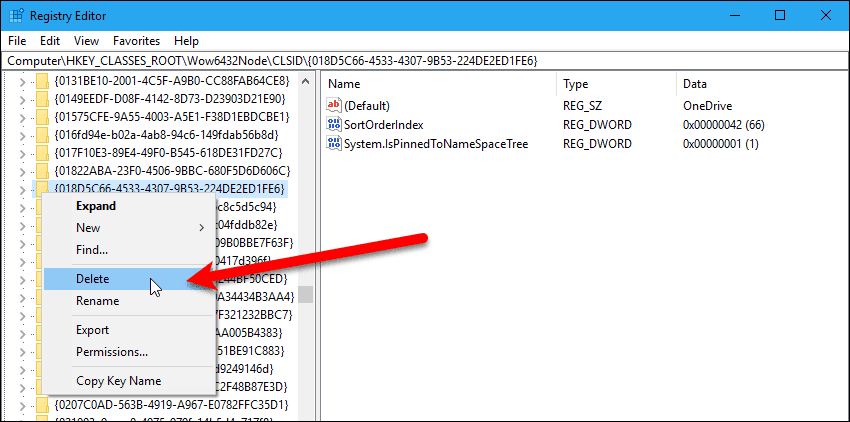
In the Registry Editor, press “Ctrl+F” and search for each of the following keys. Delete the first one if you’re using the 32-bit version of Windows 10 and delete both if you’re using the 64-bit version. When you find each key, right-click on the key and select “Delete” from the pop-up menu.
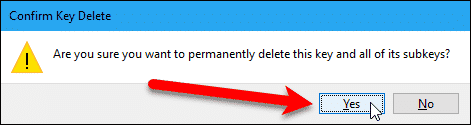
Click “Yes” on the “Confirm Key Delete” dialog box to finish deleting the key.
Reinstalling OneDrive
If you want to reinstall OneDrive, you can do so through File Explorer or the Command Prompt.
Using File Explorer
The OneDrive installation file is buried in the Windows system folder. Go to the “C:\Windows\SysWOW64\” folder on a 64-bit version of Windows 10 or the “C:\Windows\System32” folder on a 32-bit version of Windows 10. Double-click the “OneDriveSetup.exe” file and Windows will reinstall OneDrive. Once OneDrive is installed and running again, you’ll have to click the OneDrive icon in the notification area and sign in to your Microsoft account. NOTE: You may want to back up the “OneDriveSetup.exe” file to another location so you can reinstall OneDrive at any time. It’s the full setup installer for OneDrive.
Using The Command Prompt
If you want to use the Command Prompt to reinstall OneDrive, press the “Windows key+X” and select “Command Prompt“. Then, type one of the following commands at the prompt and press “Enter“. You can install OneDrive again from the command line. Open the “Win+X” menu and select “Command Prompt“. Then, type one of the following command at the prompt. 32-bit Windows: 64-bit Windows:
If the “User Account Control” dialog box displays, click “Yes” to continue. NOTE: You may not see this dialog box, depending on your User Account Control settings. We don’t recommend disabling UAC entirely, however. OneDrive is automatically uninstalled.
Do you use OneDrive? Have you ever tried to uninstall it? Let us know in the comments.